Homemade Ghee vs. Store-Bought: Get Perfect Results Every Time
Step into almost any Indian kitchen, and you’ll find a jar of golden, aromatic ghee. This revered staple, often called "liquid gold," is much more than just clarified butter. It's a culinary marvel that elevates flavors, offers a high smoke point, and boasts an impressive array of health benefits. While store-bought ghee is readily available, nothing quite compares to the depth of flavor, purity, and sheer satisfaction of making your own batch at home.
The journey from humble butter to glistening ghee is simpler than you might imagine, and the rewards are well worth the effort. This comprehensive article will not only guide you through
how to make ghee a step by step guide for perfect results every time but also delve into why homemade versions consistently outperform their store-bought counterparts.
Why Homemade Ghee is Your Culinary Game-Changer
The debate between homemade and store-bought ghee often boils down to a few critical factors: flavor, purity, and control.
*
Unrivaled Flavor and Aroma: Homemade ghee, especially when made from high-quality, grass-fed butter, possesses an incredibly rich, nutty, and slightly sweet aroma that store-bought varieties struggle to replicate. The slow, gentle cooking process coaxes out complex flavor compounds, resulting in a product that adds a profound depth to any dish. Store-bought ghee can often taste bland, stale, or even have a slightly plastic-like undertone by comparison.
*
Purity and Transparency: When you make ghee at home, you are in complete control of the ingredients. You choose your butter, ensuring it's unsalted and, ideally, grass-fed for optimal flavor and nutritional profile. This guarantees a pure product, free from the preservatives, additives, or questionable processing methods sometimes found in commercial brands. You'll know exactly what you're consuming.
*
Nutritional Superiority: Grass-fed butter, when transformed into ghee, retains beneficial fat-soluble vitamins (A, D, E, K), conjugated linoleic acid (CLA), and butyric acid. The careful home preparation ensures these nutrients are preserved, contributing to ghee's revered status in Ayurvedic tradition.
*
Cost-Effectiveness: While artisanal, high-quality store-bought ghee can be quite expensive, making it at home is often significantly more economical, especially when buying butter in bulk. You get a premium product without the premium price tag.
*
Ayurvedic Benefits Amplified: In Ayurveda, homemade ghee is considered a powerful superfood, promoting "ojas" (vitality and immunity), supporting digestion, and balancing doshas. The fresh, vibrant energy of a homemade batch is believed to enhance these benefits.
In essence, choosing to make ghee at home is choosing a superior culinary experience and a healthier product.
Understanding Ghee: More Than Just Clarified Butter
Before we dive into the practical steps, let's quickly understand what ghee truly is. Ghee is essentially clarified butter that has been cooked longer to caramelize the milk solids. This process removes the water content, lactose, and casein (milk proteins), making it suitable for many with dairy sensitivities. The removal of these components also gives ghee its incredibly high smoke point (around 485°F/250°C), making it ideal for high-heat cooking like sautéing, frying, and roasting, unlike regular butter.
The transformation occurs when butter is gently heated, causing its components to separate. The water evaporates, the milk solids fall to the bottom and brown, and a pure, golden fat remains. This golden fat is your magnificent ghee.
How to Make Ghee: A Step-by-Step Guide for Perfect Results
Ready to transform ordinary butter into extraordinary "liquid gold"? Follow this comprehensive, step-by-step guide to achieve perfect, aromatic homemade ghee every time. This process generally takes about 15-20 minutes of active time, with total time ranging from 60-90 minutes, primarily for slow simmering.
Gather Your Essentials: Ingredients & Equipment
Before you begin, ensure you have these items ready.
Ingredients:
*
500g (approximately 1 lb) unsalted butter: This is the most crucial ingredient. Opt for high-quality, unsalted butter, preferably grass-fed, for the best flavor and nutritional profile. Fresh butter (within 2-3 days of purchase) yields the best results. Avoid butter that has been frozen and thawed.
*
Optional for Cultured Ghee: 1-2 tablespoons plain, full-fat yogurt (adds a tangy depth and probiotic benefits).
Equipment:
*
Heavy-bottomed pan or Dutch oven: Essential for even heat distribution and preventing burning.
*
Fine mesh strainer or cheesecloth: For filtering out the milk solids.
*
Clean, dry glass jar with a lid: For storing your finished ghee.
For a deeper dive into selecting the right tools and ingredients, you might find our article
Master Homemade Ghee: Your Simple Step-by-Step Guide particularly helpful.
Step 1: Prepare the Butter for Its Transformation
If your butter is in a block, cut it into smaller cubes. This allows it to melt more evenly. Place the cold butter directly into your heavy-bottomed pan. If you're making cultured ghee, add the 1-2 tablespoons of yogurt to the butter now. This will introduce beneficial bacteria that contribute to a deeper, slightly tangy flavor profile as the ghee cooks.
Step 2: The Gentle Melt – Patience is Key
Place the pan over low-medium heat. The key here is "low and slow." Let the butter melt completely without stirring. As it melts, you'll notice a white foam beginning to form on the surface. This is primarily water evaporating from the butter. Do not rush this stage with high heat, as it can cause the milk solids to burn prematurely and ruin the entire batch. The entire process, from melt to finish, should ideally take 45-60 minutes, with most of that being gentle simmering.
Step 3: The Clarification Dance – Listen and Watch
This is the most critical stage, requiring your close attention.
*
Foam & Sound: As the water continues to evaporate, the initial white foam will subside, and you'll start to hear a gentle crackling or bubbling sound. This sound is the water sizzling away. As the water content diminishes, the crackling will lessen and eventually become very quiet.
*
Milk Solids & Aroma: Below the surface, you'll begin to see milk solids separating and sinking to the bottom of the pan. Keep the heat consistently low. Watch these solids carefully. They will first turn white, then yellowish, and finally, a beautiful deep golden brown. The liquid above them will become perfectly clear and bright golden. A wonderful, nutty aroma will fill your kitchen – this is the smell of perfectly cooked ghee.
*
Knowing When It's Ready: The ghee is ready when:
* The liquid is a clear, vibrant golden color.
* The milk solids at the bottom are deep golden brown, resembling caramelized bits.
* The crackling sounds have almost completely stopped, indicating nearly all water has evaporated.
* The aroma is distinctly nutty, not burnt.
*
Critical Warning Signs to Stop Cooking:
* If the milk solids turn black or dark brown.
* If you smell a bitter, burnt odor.
* If the liquid becomes dark brown instead of golden.
* If smoke starts to appear.
Stop cooking immediately if you observe these signs. Unfortunately, burnt ghee is irreversible and must be discarded.
For further insights into the subtle cues of perfectly cooked ghee, consider reading our article
Unlock Ayurveda's Liquid Gold: The Easy Way to Make Ghee at Home.
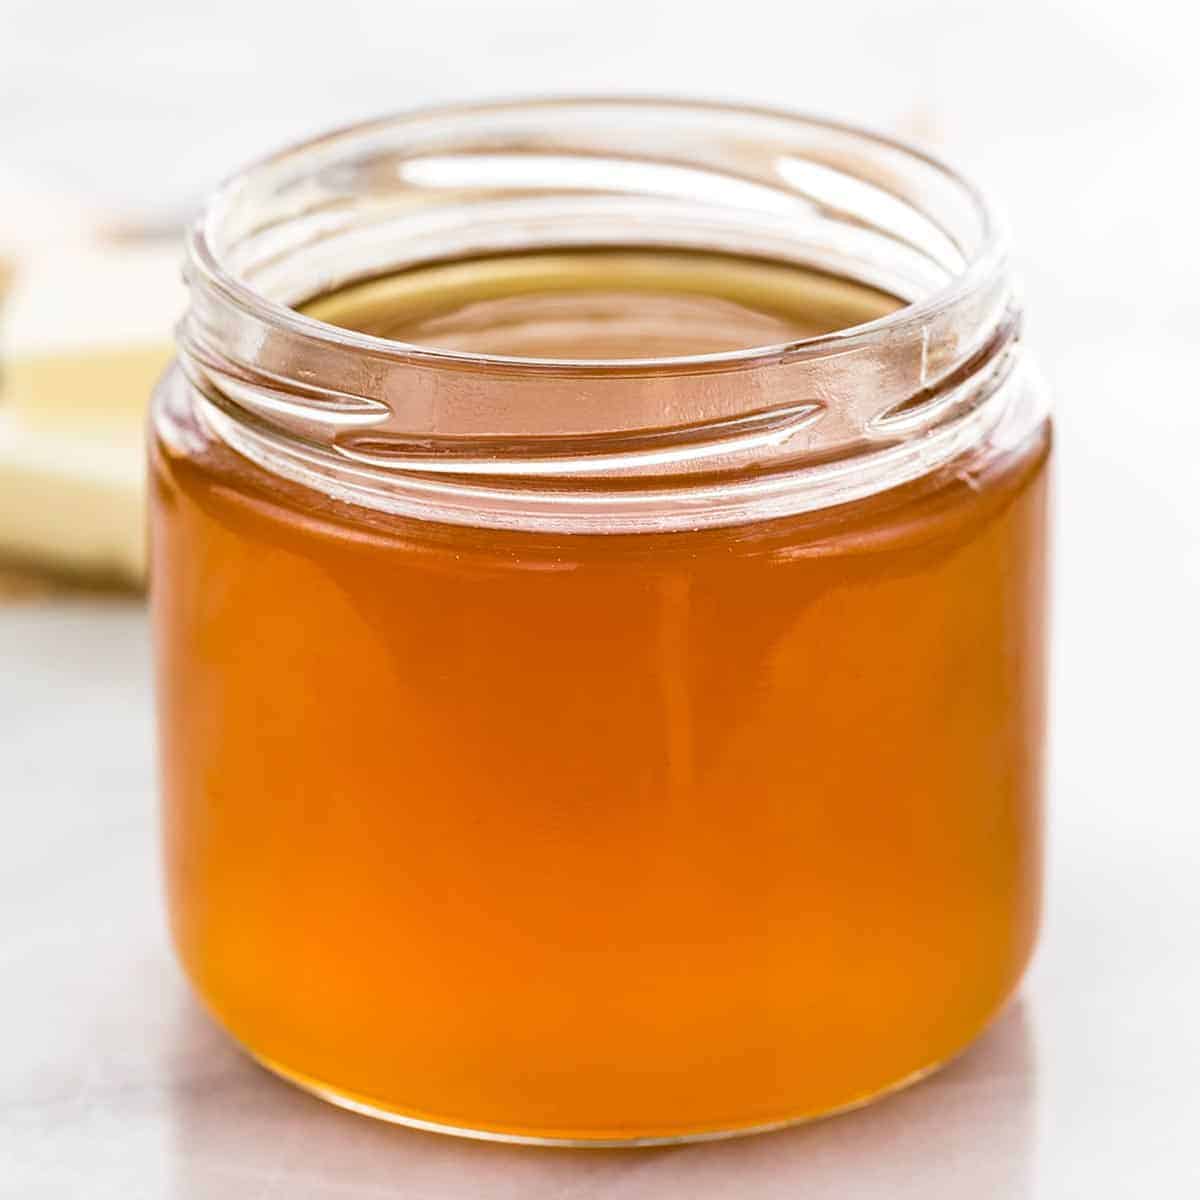
Step 4: Filter and Store Your Liquid Gold
As soon as your ghee reaches that perfect clear golden state with deep golden-brown solids and a nutty aroma, remove the pan from the heat. Let it cool for 5-10 minutes – this allows any residual bubbling to settle and prevents you from handling excessively hot oil.
Carefully pour the warm ghee through a fine mesh strainer lined with cheesecloth (if using) into your clean, dry glass jar. The strainer will catch all the beautiful golden-brown milk solids, leaving you with pure, clear ghee. Discard the strained solids.
Allow the ghee to cool completely in the jar before sealing it with a lid. It will solidify into a creamy or grainy texture, depending on the butter and cooling process.
Beyond the Basics: Tips for Ghee Mastery and Ayurvedic Wisdom
To truly master the art of ghee making, consider these additional tips and appreciate its deeper significance:
*
Always Use a Heavy-Bottomed Pan: This cannot be stressed enough. It prevents hot spots and ensures even cooking, drastically reducing the risk of burning.
*
Don't Stir! Stirring can reintroduce the milk solids into the liquid, making it harder for them to settle and brown evenly, and potentially leading to scorching. Let the natural process unfold.
*
Trust Your Senses: Your nose and ears are your best guides. The shift from sizzling to quiet, and from a milky smell to a rich, nutty aroma, are clear indicators of progress.
*
Storage: Properly made ghee is incredibly stable. Store it in an airtight glass jar at room temperature in a cool, dark place for several months (up to 3-6 months). If you prefer, or live in a very warm climate, you can refrigerate it for even longer shelf life (up to a year or more). Always use a clean, dry spoon to scoop out ghee to prevent contamination.
*
The Ayurvedic Connection: Ghee is considered 'rasayana' (rejuvenative) in Ayurveda. It's believed to ignite 'agni' (digestive fire), lubricate connective tissues, and carry nutrients deep into the body's cells. It's particularly beneficial for balancing Vata and Pitta doshas, while Kapha types should consume it in moderation due to its nourishing and heavy qualities.
Making homemade ghee is a sensory experience – from the gentle simmer to the rich aroma that fills your home. It’s a practice in patience and mindful cooking that yields a product far superior to anything you can buy off the shelf. Embrace this ancient tradition and elevate your cooking with your very own jar of golden, homemade goodness.