Master Homemade Ghee: Your Simple Step-by-Step Guide
There's a certain culinary alchemy that happens when simple butter transforms into a golden, aromatic elixir known as ghee. Far more than just clarified butter, homemade ghee is a staple of traditional Indian cuisine and revered in Ayurveda as a superfood, celebrated for its rejuvenating, nourishing, and anti-inflammatory qualities. While store-bought versions are readily available, nothing quite compares to the purity, depth of flavor, and incredible aroma of a batch you've crafted yourself. If you’ve ever felt intimidated by the idea, prepare to be delighted: mastering homemade ghee is easier than you think. Follow our comprehensive how to make ghee a step by step guide, and you’ll soon be enjoying this liquid gold in your own kitchen.
Ghee's benefits extend beyond its rich, nutty taste. In Ayurveda, it's known to promote ojas (immunity and vitality) and is particularly beneficial for Vata and Pitta doshas, with Kapha types enjoying it in moderation. It boasts a high smoke point, making it excellent for sautéing, frying, and roasting, while its unique flavor elevates everything from curries to baked goods. This guide will walk you through the process, ensuring perfect results every time.
The Essentials: What You'll Need for Your Ghee-Making Journey
Before we dive into the creation of your golden elixir, let's gather your simple ingredients and equipment. The beauty of ghee lies in its minimalism, requiring just one core ingredient and a few common kitchen tools.
Ingredients:
- High-Quality Unsalted Butter: We recommend starting with 500g (approximately 1 lb) of unsalted butter. Opt for grass-fed butter if possible, as it yields a richer flavor, deeper color, and higher nutritional content due to its superior fatty acid profile. Unsalted is crucial because we want to control the final flavor and ensure the purity of the ghee, as salt can sometimes burn or interfere with the clarification process. For those seeking a truly traditional experience, fresh cream can also be used, though this method is longer and more involved.
- Optional: 1-2 tbsp Yogurt: If you're keen to try your hand at cultured ghee, which offers a slightly tangier, more complex flavor profile, a spoonful of plain yogurt added at the beginning of the process will introduce beneficial bacteria.
Equipment:
- Heavy-Bottomed Pan or Dutch Oven: This is non-negotiable. A heavy bottom ensures even heat distribution, preventing the butter from scorching and allowing for a slow, gentle clarification. Avoid thin-bottomed pans, which are prone to hot spots and burning.
- Fine Mesh Strainer or Cheesecloth: To separate the pure ghee from the milk solids. If using cheesecloth, a double layer draped over a regular strainer will offer superior filtering.
- Clean, Dry Glass Jar with a Lid: For storing your finished ghee. Glass is ideal for non-reactivity and longevity.
- Heat-Resistant Spatula or Spoon: For initial stirring (before simmering) and skimming foam.
- Small Ladle or Spoon: For transferring the ghee without disturbing the solids.
Quick Overview: Anticipate approximately 15-20 minutes of active cooking time and a total process duration of 60-90 minutes. From 500g of butter, you can typically expect to yield around 350g of pure ghee.
Your Step-by-Step Journey to Golden Ghee
Here’s your definitive how to make ghee a step by step guide to transforming butter into liquid gold. Remember, patience is your most valuable ingredient here.
Step 1: Preparing Your Foundation – Quality Butter Matters
Begin by taking your chosen butter directly from the refrigerator. If it’s in a block, cut it into roughly 1-inch cubes. This helps it melt more evenly and quickly, reducing the time it spends in the "danger zone" of uneven heating. Place the butter into your heavy-bottomed pan. If you’re making cultured ghee, now is the time to add 1-2 tablespoons of plain yogurt to the butter in the pan. Pro Tip: For the best flavor and purest results, use fresh butter within 2-3 days of purchase. Avoid butter that has been previously frozen and thawed, as its texture can affect the ghee-making process.
Step 2: The Gentle Melt – Patience is Key
Place your pan with the butter (and optional yogurt) over low-medium heat. The goal here is a gentle melt, not a rapid boil. Allow the butter to melt completely. You'll soon see a layer of white foam begin to form on the surface – this is the water content in the butter evaporating. Crucially, once the butter has fully melted and starts to simmer, do NOT stir. Stirring can disturb the milk solids at the bottom of the pan, causing them to float and potentially burn. The "low and slow" approach is critical; high heat will scorch the milk solids and give your ghee a bitter, burnt taste. This initial melting and simmering phase should take about 10-15 minutes, eventually leading to a subtle crackling sound.
Step 3: The Clarification Revelation – Watching for Liquid Gold
This is where the magic truly unfolds and requires your full attention. As the water continues to evaporate, the crackling sound will gradually subside. The initial white foam will dissipate, revealing a clearer, golden liquid beneath. At the bottom of the pan, you’ll start to see white milk solids forming. Continue to monitor the heat and the ghee closely. These solids will slowly change color, first to a pale yellow, then a beautiful golden brown. The ghee is ready when:
- The liquid is clear, shimmering, and a rich golden color.
- The milk solids at the bottom of the pan have turned a deep golden brown, resembling toasted nuts.
- There is a distinct, nutty, pleasant aroma – not burnt or acrid.
- The crackling sounds have almost completely ceased, indicating nearly all the water has evaporated.
Stop Cooking Immediately If: You see black or very dark brown solids, the liquid turns a dark brown, a bitter or burnt smell emerges, or wisps of smoke appear. These are signs the ghee is overcooked and likely burnt. It's better to err on the side of slightly undercooked (it might be a little cloudy) than burnt (which is unusable). The entire clarification process, from melted butter to golden ghee, can take 45-60 minutes depending on your heat and quantity of butter.
Step 4: Filtering and Storing Your Pure Elixir
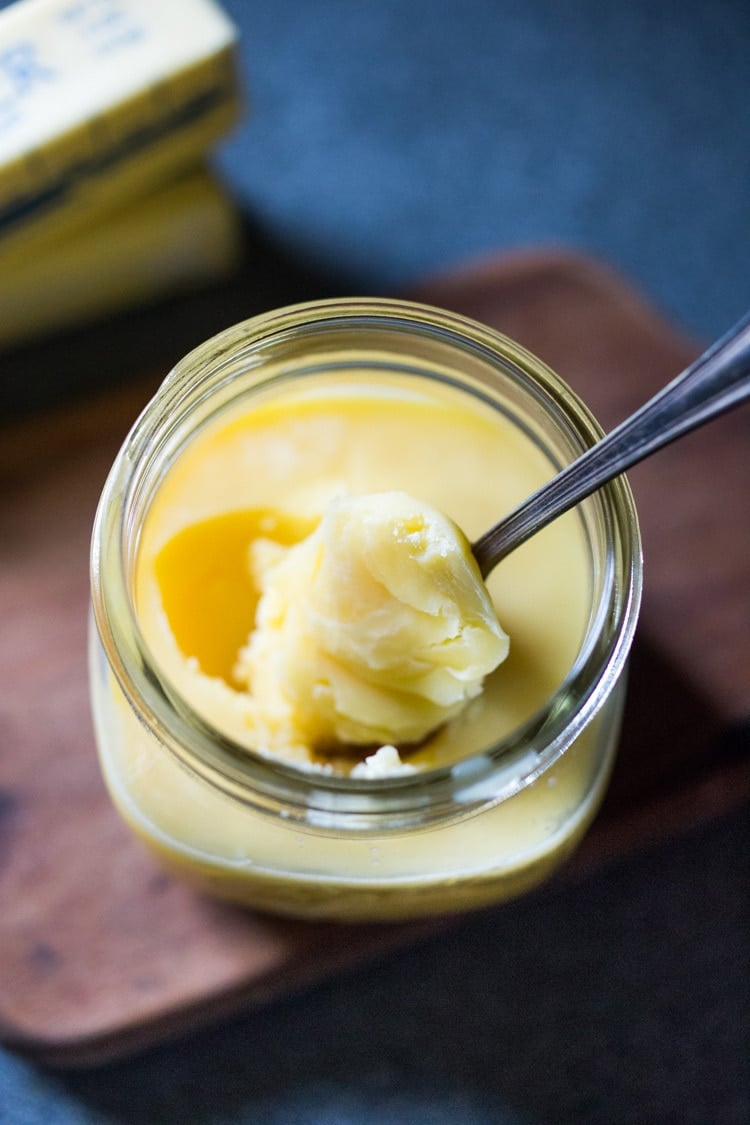
As soon as you observe the perfect ghee signs, remove the pan from the heat immediately. Allow it to cool for 5-10 minutes. This cooling period helps the remaining solids settle further and prevents the hot ghee from cracking your glass storage jar. Carefully, without disturbing the settled solids, strain the warm ghee through your fine mesh strainer lined with cheesecloth (if using) into your clean, dry glass jar. The strainer will catch all the golden-brown milk solids, leaving you with beautifully clear, pure ghee.
Ensure your storage jar is thoroughly dry. Even a tiny bit of water can introduce bacteria and significantly shorten your ghee's shelf life. Once strained, allow the ghee to cool completely uncovered at room temperature before sealing with a lid. It will solidify into a beautiful, opaque, golden texture. For a deeper dive into why homemade truly triumphs over its store-bought counterparts, check out our article on Homemade Ghee vs. Store-Bought: Get Perfect Results Every Time.
Mastering the Art: Tips for Perfect Ghee Every Time
While the steps are straightforward, a few insights can elevate your ghee-making game and help you troubleshoot common issues.
Troubleshooting Common Issues:
- Burnt Ghee: The most common pitfall. This happens due to high heat or insufficient monitoring. If the solids turn black or the smell is burnt, unfortunately, it's best to discard and start fresh with lower heat and closer attention.
- Cloudy Ghee: If your ghee isn't perfectly clear, it might not have been cooked long enough (leaving some water content) or not strained thoroughly. You can gently reheat it over low heat, let solids settle, and re-strain.
- Takes Too Long: If your ghee is taking significantly longer than 60-90 minutes, your heat might be too low. Slightly increase it, but always stay in the "low-medium" range.
Pro Tips for Enhanced Flavor and Experience:
- Go Grass-Fed: As mentioned, grass-fed butter often has a higher butterfat content, giving you more ghee and a richer, more nuanced flavor. It also boasts more beneficial nutrients.
- Wider Pan for Faster Evaporation: A pan with a wider base provides more surface area for water to evaporate, potentially speeding up the process slightly.
- Don't Waste the Solids: The golden-brown milk solids (sometimes called "ghee residue" or "karak") are delicious! They have a toasty, nutty flavor and can be spooned over rice, mixed into oatmeal, used in baking, or even spread on toast.
- Embrace the Aroma: Pay attention to the changing smells throughout the process. It's a key indicator of progress and readiness.
To truly Unlock Ayurveda's Liquid Gold: The Easy Way to Make Ghee at Home, understanding its traditional roots and profound health benefits is key, and closely following these sensory cues will guide you.
Storing Your Liquid Gold and Beyond
Once cooled and solidified, your homemade ghee is incredibly shelf-stable. Store it in an airtight glass jar in a cool, dark pantry. Because all the water content has been removed, ghee is anhydrous and resistant to microbial growth, meaning it does not require refrigeration. It will last for several months, often up to a year or even longer, without spoiling.
Ghee is a versatile ingredient in the kitchen. Its high smoke point (around 485°F / 250°C) makes it ideal for high-heat cooking like sautéing, stir-frying, and deep-frying, without fear of burning and producing harmful free radicals. Use it as a healthier alternative to butter or cooking oils in almost any dish. Its rich, nutty flavor is superb in Indian curries, lentil dishes, roasted vegetables, and even brushed over warm bread or stirred into coffee for an energy boost. Beyond the kitchen, ghee is also valued in Ayurvedic practices for external applications, such as moisturizing skin or conditioning hair.
Conclusion
Creating your own homemade ghee is a wonderfully rewarding experience that connects you to ancient culinary traditions and delivers a superior product. This how to make ghee a step by step guide has equipped you with all the knowledge and tips to confidently embark on your ghee-making journey. From selecting the finest butter to carefully monitoring its transformation into clear, golden liquid, you'll find the process meditative and the results incomparable. Not only will you enjoy the rich, nutty flavor and incredible versatility of homemade ghee, but you'll also benefit from its celebrated Ayurvedic properties. So, gather your ingredients, set aside an hour or so, and prepare to elevate your cooking and well-being with your very own liquid gold!
